We’ve already looked at the different types of computer video equipment in our previous article on webcam computer surveillance, here is part one of a three part guide to installing a dedicated security camera system using the best tools available on the internet.
Cameras
USB Cameras
 USB cameras are the most prolific cameras available today. These cameras work fine indoors but will over expose as soon as they are pointed outside. USB cameras are also suffer from reliability problems. Tests we conducted showed that the USB camera usually needed to be reset (plugged out and in again) at least once a month. It’s not recommended to use USB cameras except for indoor sporadic monitoring.
You can get simple composite cameras from online stores such as Deal Extreme for as little at AUD $25 delivered to your door.
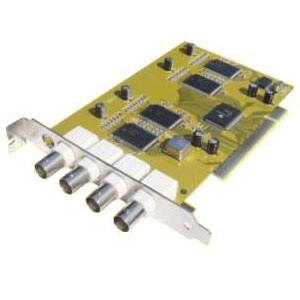
The benefits of these types of cameras is that they are cheap. Some of these cameras are waterproof which means you can mount them outside and if they break or get stolen it’s no huge loss. 1.3Ghz or 2.4Ghz wireless cameras are not recommended because they are not encrypted and are easily viewable by people nearby using the right equipment. (A potential bonus in a shared driveway situation perhaps?) These cameras will connect to your computer via a capture card.
Composite are great cameras to start with but if you’re wanting to use VMWare to house your zoneminder installation IP cameras are required. VMware server doesn’t support capture cards so IP cameras are your only option. There are USB capture cards available which should work with VMWare and although we haven’t had a chance to test them yet they are rumoured to be unreliable
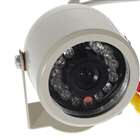 composite IR Camera
IP cameras come in three colours, WiFi enabled, Wired only or both. One of the big no-no’s with cameras is sending the signal over wireless. Most people know that wireless is hack-able, so you don’t want to be giving potential burglars a look into you garage. WiFi cameras with microphones even offer the burglars the opportunity to listen in. We recommend using wired cameras as they are not susceptible to WiFi hacking.
Lighting
Cameras pointed indoors still need light, if you’re monitoring a warehouse you’ll need to light the area if you want to see the area. If the area’s dark you have the option of lighting the area or using Infrared.
Many cameras have built in infrared for night viewing. It sounds great but unfortunately the picture quality from infrared is quite poor. These cameras often have Infrared LEDs built into the camera head but these are almost always not bright enough to illuminate the area you need to see.Additional Infrared lights are needed to illuminate the area to get a better picture.
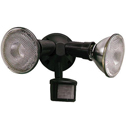 Motion detection sentry lights
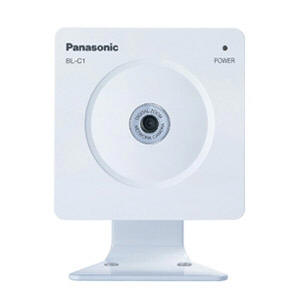
I’m sorry to say, but the best results for night vision are not achieved using Infrared. cheap garden variety motion detecting sentry lights can be configured to throw a 250 watt flood light over the area when they see movement, your cameras can then record a nice bright high quality image. If you want an even better quality image go for a camera such as the Panasonic BL-C1 with colour night vision and a set of sentry lights.
Software
 Zoneminder is a free camera monitoring package that runs on most Linux distributions. It’s considered one of the best camera monitoring solutions out there with all of the features you would expect of a commercial package.
Zoneminder’s only drawback is that there is very little documentation available for it. Having said that if you understand how the web works and know a little about PHP you can make changes to the way that Zoneminder works. If you don’t you can still take advantage of some of the most sophisticated features.
We’ve put together a short list of some of Zoneminder’s more powerful features
- Fully web based application
Zoneminder is fully web based, all viewing and configuration can be done from the web browser. This makes remote viewing a snap, simply forward the zoneminder port through your ADSL modem and now you can see your cameras from anywhere. - Camera Support
Zoneminder supports all common cameras available, but Linux might not, you’ll need to make sure that USB cameras and capture cards have driver support in fedora - Motion detection
Zoneminder’s advanced motion detection lets you mark off parts of the image so that they do not trigger motion. - Motion capture
Zoneminder will record events and send them to you as alerts via email or FTP - Timestamp
Not a rocket science but a necessary feature for a security system
Operating System
 CentOS is a community port of the famous RedHat Enterprise Linux used across the globe. We recommend using CentOS or Fedora as it has a wide range of supported hardware which will help you when selecting USB or capture cards for use with your Zoneminder system
We recommend that you install Zoneminder on a Virtual Machine under VMware, ESXi, Hyper-V or KVM. You’ll have to install Zoneminder on your server natively if you plan to use composite cameras and a capture card because current Virtualisation does not support capture cards at this time.
If you’re not familar with Virtualisation, VMWare server allows you to run a copy of another operating system in a window on your desktop. The operating system running in the windows is completely oblivious to the fact it is not running natively on your hardware and will run and act like a normal computer.